Dictionaries.
Before we begin, I just want to let you know that this is the last section on basics. The next post (Which will be on Friday), we will begin the first of the five stages of hacking (Reconnaissance). I don’t know about you but I’m sure excited to dive into hacking and use all the things we’ve learnt so for.
Now, on to the content for this post.
Dictionaries are Python’s implementation of a data structure that is more generally known as an associative array. A dictionary consists of a collection of key-value pairs. Each key-value pair maps the key to its associated value.
You can define a dictionary by enclosing a comma-separated list of key-value pairs in curly braces ({}). A colon (:) separates each key from its associated value.
Dictionaries and lists share the following characteristics:
• Both are mutable.
• Both are dynamic. They can grow and shrink as needed.
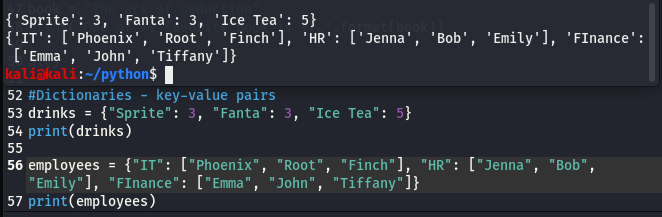
• Both can be nested. A list can contain another list. A dictionary can contain another dictionary. A dictionary can also contain a list, and vice versa.
Dictionaries differ from lists primarily in how elements are accessed:
• List elements are accessed by their position in the list, via indexing.
• Dictionary elements are accessed via keys.
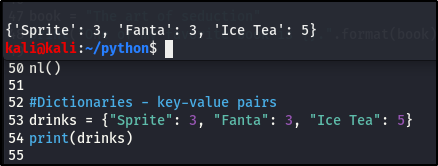
So the drink is your key and the price is your value, hence the key-value pair. There can be multiple values to a single key.
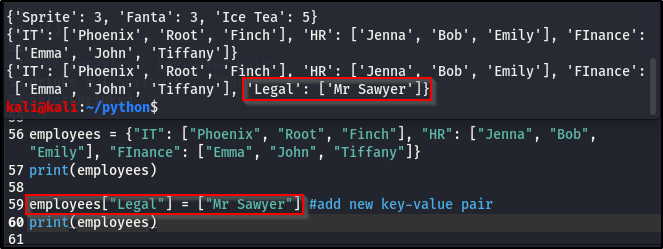
What if we wanted to add another key-value pair, how do you think we’d go about that? Lets try that with our employee example, we’ll add a new department.
There are multiple ways to add new key-value pair, here’s one way:
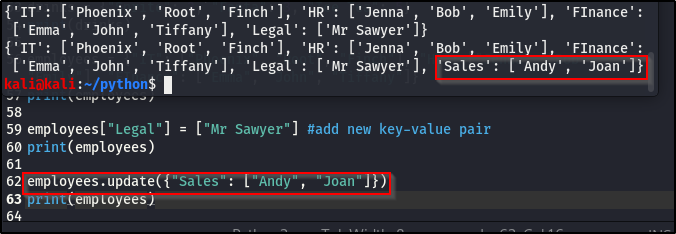
Here’s another way:
In a situation where a value has changed, we can update the value in our dictionary. Lets use the drink example:
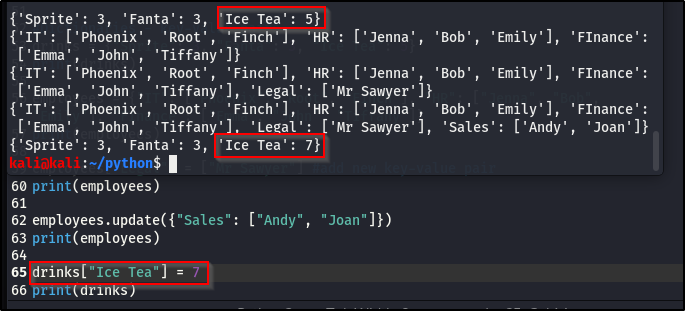
The price for the Ice Tea got updated from 5 to 7.
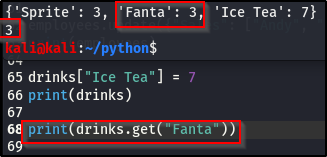
W can also get a particular item out from our dictionary, instead of printing out all the information.
Here’s how we can go about that:
NB:
• Lists have brackets []
• Tuples have parenthesis ()
• Dictionaries have curly braces {}
This is one of those areas in Python you won’t need or see in this course but it’s also a very valuable thing to know and be able to tell them apart, if and when you read any code.
Sockets.
We are going to be using sockets to connect two nodes together.Meaning, we are going to use sockets to connect to an open port and IP addressee. You’ll see this in our building of a port scanner and later on in exploit development, where we reach out to a specific port and establish a connection.
Here, we’re going to write out a simple socket script and connect to an open port with the script, basically building up on it, so it’s recognizable to you when we build our port scanner and move along through the course.
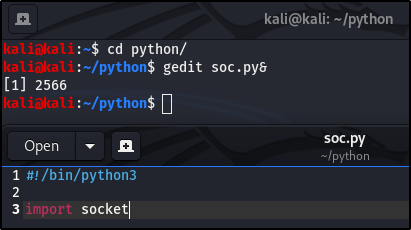
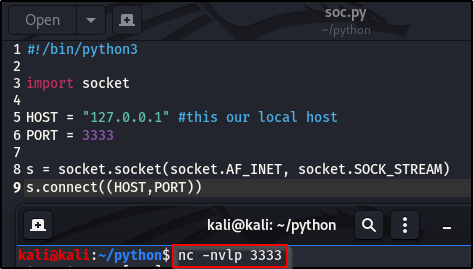
Create a file, but don’t call it socket.py (you’ll run into issues, cause it’s going to think it’s a socket), you can call your file anything else. I’m going to name mine, soc.py.
If you remember in the importing modules post, I said importing is important. Well, we are going to import socket but before we do that, declare the she-bang!
Then we’re going to define a couple of variables
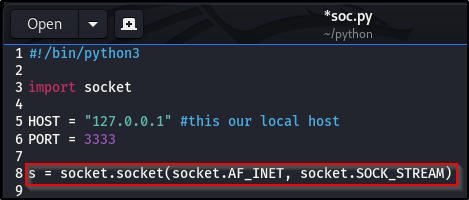
It looks long and very confusing, it did for me at first too but don’t let it overwhelm you. This is just making things easier for us, you can assign any four number to the port. We just declared a variable s, that stores all of that in one and the syntax is very common when it comes to sockets,
• So AF_INET – just think of it as IPv4, we’re connecting over an IPv4 connection.
• socket.SOCK_STREAM – you can think of it as a port
Connect is just another part of the socket module. I’m going to use a tool that we haven’t used before, called Nrtcat but we’ll use it later on in the course.
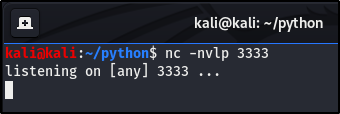
Please don’t worry about this and what it really means, we’ll look in-depth to it in a later time in the course. All its doing, is waiting for anybody to connect to us through the stated port.
The socket script we’ve written so far does nothing other that establish a connection. Let’s run it and see what we get.
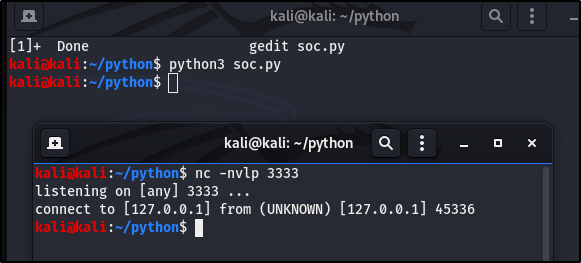
We didn’t write in the script what it should do after making the connection. So I just connected to myself, without any other thing being done.
The purpose of this section, was to use socket to connect one node to another node, which we did. We’re going to build a relatively not so great port scanner but the point is to really show you how sockets, scanning and establishing a connection works.
Port Scanner.
This is the last post in the Python section, then we move on to Hacking -Information Gathering.
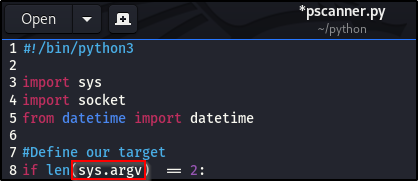
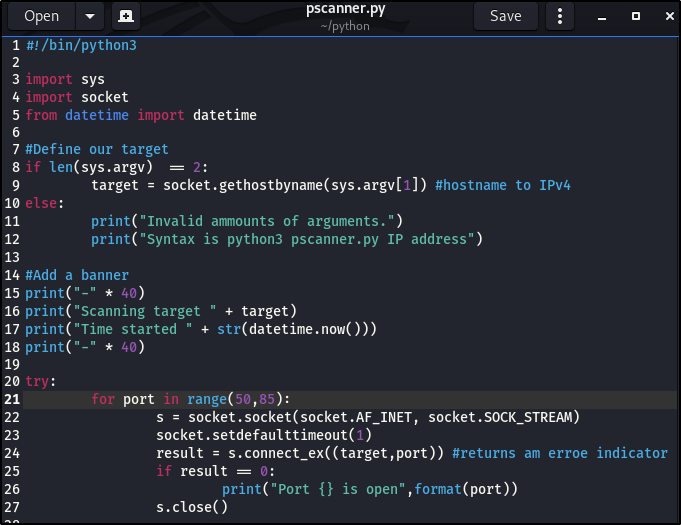
Alright, we’re going to be building a port scanner.It’s going to be a functional but a terribly built port scanner. So I’m going to gedit a new file and call it pscanner.py, as always, don’t forget the she-bang!
If you started the Python section from the first part, congrats, you’re going to see everything we’ve learnt so far being put to use, and if you didn’t, I hope you have the basic knowledge of Python and are able to understand the code.
While running our port scanner file (pscanner.py), we provide an IP address after it, and with the IP it’s going to scan through a selected port range, and try to return results, whether or not the port is open. So basically, we’re just checking if a port is open on a machine.
To achieve this, we’re going to need to:
• import sys – remember sys, I said we were going to use it later on? Well, here is one of those later on I was referring to.
• import socket, cause we’re going to make a node to node connection
• import datetime from datetime, to make a banner

NB: make it a habit to have good notes (comments) when building a script, so you could go back read and understand it and so someone else can too.
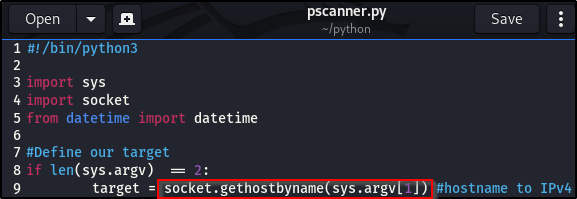
Our script needs to take only two arguments and we need to specify those arguments from the very start.
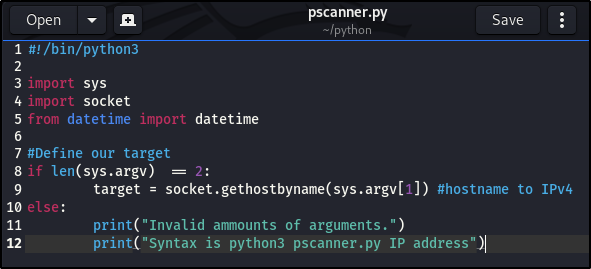
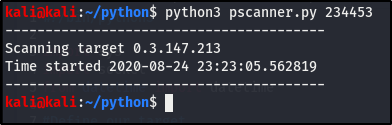
I’ll run this both with and without the right arguments, so you can see the results.
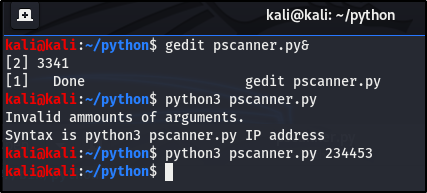
We basically get nothing back when I put the argument after the file, because the digits make absolutely no sense and is not an IP address, a specification we didn’t tailor our script to meet.
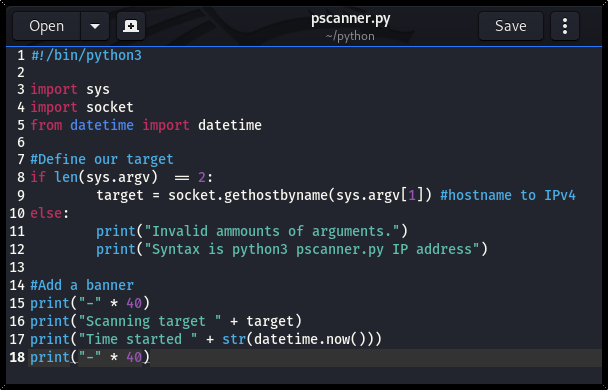
As you can see, we’ve used the import sys, socket and datetime, that we learnt in previous posts in the Python section. Now lets see what our print out looks like:
Next we are going to do a try statement. We are going to try to do something and if we can’t, we have exceptions. OK, I’m going to build that out and you can see what it looks like. We’ll see try statements later in the exploit development section.
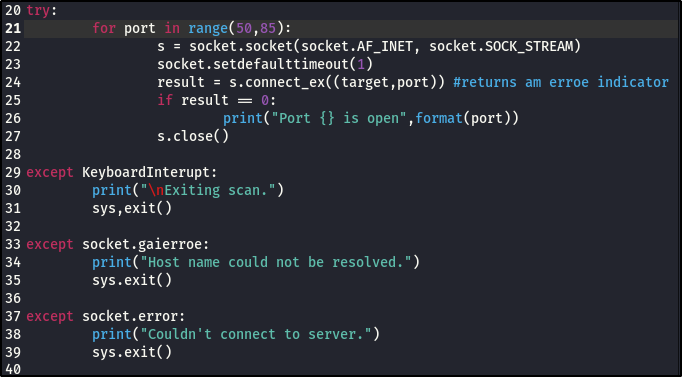
If we wanted to do a full on port scanner, we would do: for port (1,65535), that will take forever to scan.
Remember, AF_INET is IPv4 and SOCK_STREAM is our port. We are setting default timeout to (1), so when it tries connecting to a port and if the port is not connectable, it’ll wait 1 second and then keep moving. So it doesn’t just stay there waiting to connect to a port, we set the timeout ourselves.
If a port is open, the result back is going to be zero (0) and if a port is not open, it’s going to print an error, which is going to trigger a one (1).
Lets work through the script to get a better understanding of what’s happening:
• Remember, for loop is an iterate, and we’re defining a port in a range of 50-85, so the process will be repeated from 50 through to 85.
• We’re going to establish the variable s, which we did in the socket part of this post.
• Then we want to make a connection, and our default timeout will be one (1) second after the connection is made.
• Next, store inside a variable called result, the target (which we established in the first part of the script) and our port (which is the iterate in our for loop)
• if that port is open, it’s going to return zero (0) and return one (1) if it’s not open.
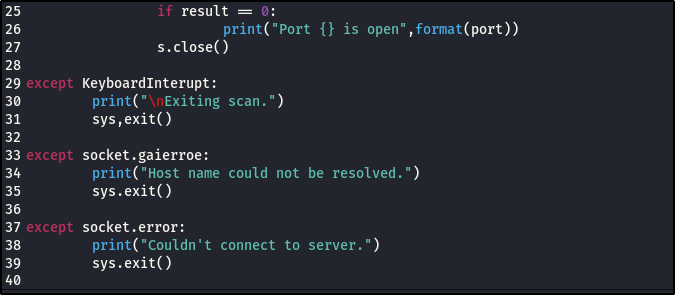
• If the port is open, print that the connection is zero (0).
• Then close the connection.
The process is repeated over and over, through to port 85.
There are exceptions that can occur while the script is running:
• KeyboardInterupt is the ctrl + c. We need to define that there is an interruption, to be able to interrupt the scan. So ctrl + c exists the program.
• If we can’t resolve the host name, we exit the program.
• If we can’t make a connection to the IP address in general, exit the program.
This is what I meant when I said “You have to be able to think logically”, being able to think through all the feasible scenarios that can happen and writing it out into your script.
Reasons why this port scanner script isn’t a great one:
• It’s going to run through the ports one at a time, with a second timeout and then reiterate.
• This will take up longer time. As we move along, we’ll see that there are tools used to scan, which are better designed, much more efficient and much faster. We could use threading – which will take the process and run multiple processes at once and allow scanning of lots of ports at once.
• We didn’t build in the right structure that our IPv4 argv should take, hence making it take any character as we saw in an earlier image.
Alright, go ahead and run your script and I recommend you run it against your router or a machine in your network and has a port open.
I’m used my router, which is why I used the range port 50 – 85, my router should have port 53 open because of DNS and port 8o open because I need to access the web interface on it.
I’m going to leave the improvement of the port scanner for you to think through and clean up. If you’re interested, I’d love to see how you go around to making it a better port scanner. You can send me a shot of it on Telegram or Instagram.
This is it for the Python section and hopefully it all made sense, you keep practicing and are able to make sense and interpret whatever code you come across.
Now that we’re done with all the basic, we’re going to move on to the hacking section.
See you in the next post. As always, Keep learning. Keep hacking. And don’t forget to breathe!
