Setting up Virtual Machine.
I decided to use VMWare workstation player, after only ever using virtual box.
Google your choice of VM (in my case workstation player 15), download and install (follow the installation process)

Google Kali Linux download and search through the results for, custom image by Offensive security, download appropriate image for VM.
Download 7zip, to unzip custom Kali download.
Boot up VMWare and click open virtual machine, go to the directory where Kali has been unzipped and click open. You can edit the settings, increase or decrease the space allocated and change the network settings too, if needed. Once done adjusting settings to your taste and PC specs,

Kali CLI.
In Linux, the terminal is much more powerful than using GUI (Graphical User Interface). so learning to navigate your way around is essential.
Commands, uses and meaning:
1. pwd (print working directory) – tells you what directory you’re in.
2. cd (change directory) name of directory – this moves to the name of directory provided.
cd .. – this takes you one step back, outside the present directory.
3. ls (list) – lists folders or files in the current directory
.
NB: Everything in Linux is case sensitive.
4. mkdir (make directory) directory name – creates a new folder in present directory.
5. rmdir (remove directory) directory name – deletes whatever directory name is placed after the command..
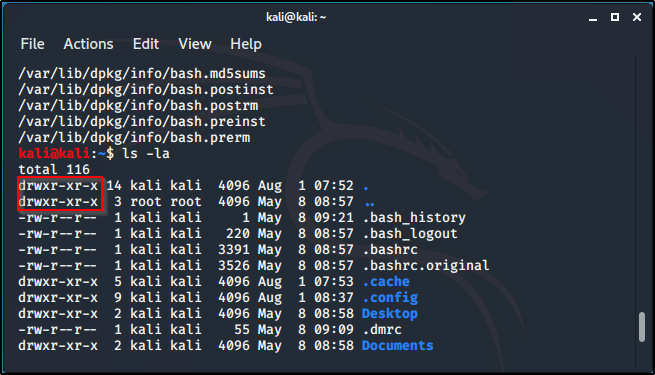
6. ls -la – shows lists of hidden folders.
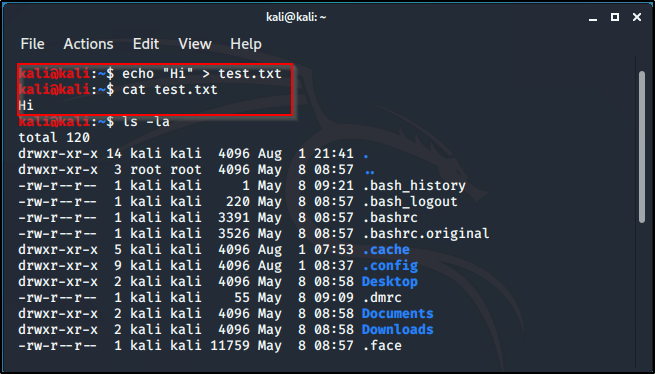
7. echo “Hi” > test.txt – creates a file named anything in .txt and writes whatever is in the “” in the created file.
8. cp (copy) text.txt directory name – this will copy the test.txt file into the named directory.
9. rm directory name/file name – to delete file from directory.
10. on keyboard click the up arrow to navigate to old executed commands.
11. clicking tab, while typing, complete the command and if it doesn’t, double click tab to get the options of possible characters.
12. mv (move) test.txt directory name/ – moves file to named directory (not copy, cut).
13. locate – it locates whatever is typed after the command, searches through the system and gives possible results.
14. updatedb – updates everything.
14. passwd – change password to whatever you choose.(make sure it’s secure and you’ll remember)
15. man – is the manual/instructions (man pages) for any command that can be run, e.g: man -ls.

Users and privileges.
When the command ls -la, brings up all files (including the hidden ones). Here is what certain characters represent:
– : means it’s a file.
d : directory.
rwx : read, write, execute. It’s the permission settings that a particular file has.This is where owners can read, write and execute files.
r -x : read and execute files only, for group users.
r -x : users can only read and execute.
There are three stages of privileges when the li -la command is executed.The above characters, would tell the level of privileges given.
the first is for the owner, the second is for group users, and the third is for basic users. In a case where a file is all rwx (read, write, execute) on all stages, it’ll look like this: drwxrwxrwt. As shown below:

The below is, rwx (read, write, execute) – for owner, xr (read, execute) – for group users, and x (execute) – for other user:
Creating a script, it won’t run until given full access (rwx). So changing access: create a file (echo “what is written in file” file name.txt), by default the privileges given are -rw-r–r (read, write – for owner and read – for everyone else). So to change privileges/mode, use chmod (change mode), there are a couple options, 777 gives full rwx access across all stages. To execute this for the above example, chmod 777 name of file.txt, it changes file privileges to the full access.
Creating a file:
Changing the privileges to all rwx:
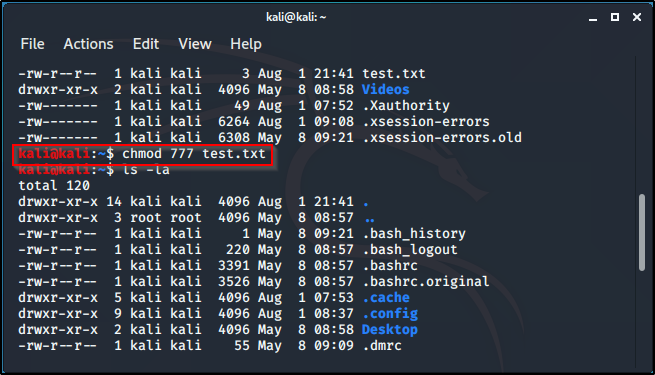
Privileges changed to all rwx:

Notice, the color of the file changes too, showing that full privilege is granted.
Changing the mode (chmod), can also be done by writing chmod +x filename.file extension, an alternative to using chmod 777 filename ,file extension.
To add a new user: adduser username (eg Alice), set password and fill in the other field if needed.
cat /etc/psswd – shows all the users,but doesn’t show the password.
cat /etc/shadow – shows the hashing format for user passwords. Hashing tool (like hashcat), can be used to break it down and crack the password.Having access to the shadow files gives a large possibilty of getting the user privilege, especially if you’re good at cracking passwords.
To switch user: su (switch user) username (eg Alice) If switched to a user that isn’t root, switching back to root requires root’s password.
Root has full access and permission to do everything but until other created users are assigned full privileges, their access will be limited.
For a user, other than root to have full access to files, they have to access the sudo file. While in the user, type in command: sudo passwd root.
This will automatically ask for present users password and change into root.
Network commands.
So the first basic command we’ll cover is:
ifconfig (the PC version is ipconfig) – It shows your different interface types and the different IP adresses associatef with them.
In the image below, you can see eth0 IP address (inet), you could see the netmask, the broadcast, and even the MAC address (ether).

If your machine has a wireless adapter (which you’d need if you want to do wireless penetration testing at some point), you’re going to need iwconfig command.
Another command is ping. In your terminal you type out the command ping and the address you’re trying to talk to. ping result is endless, until you kill the proce3ss with ctrl + c
If you ping a machine and don’t get any replies, it’s either the machine is not on the network or the machine is just blocking ICMP traffic. ICMP is another word for ping.
arp is another command, arp -a. arp is just going to show you IP addresses that it talks to and the MAC addresses associated with it. So arp is just a way of associating IP addresses with MAC addresses, and once you know that you can also look at netstat, which is our next command.
netstat -ano, would show you the active connections that are running on your machine. It shows, what’s talking, what’s open and this comes in handy in a pentest, to see if a machine is talking with somebody else, same as arp. You want to know what the machine is associated with, if it’s talking to something on a port.
The last basic command is route, it’ll print you your routing table. The routing table is important because, it tells you where your traffic exits.
Next we’ll be taking the second part of the Command Line Interface.
Until nest time. Keep learning. Keep hacking! And don’t forget to breathe.
